
You found bed bugs. You’re itching (literally), you’re stressed, and you just Googled the cost of professional heat treatment. $2,000 to $4,000. Ouch.
So now you’re wondering: can I just do this myself?
The short answer is yes, but only if you do it right. DIY bed bug heat treatment can genuinely work. The science is solid. The problem is that most people get it wrong, and an incomplete treatment is almost as bad as no treatment at all. One surviving pregnant female and you’re back to square one.
This guide covers everything: the science, the equipment, the step-by-step process, the real risks, and the honest cost breakdown. By the end, you’ll know exactly whether DIY heat treatment is right for your situation and how to pull it off if it is.
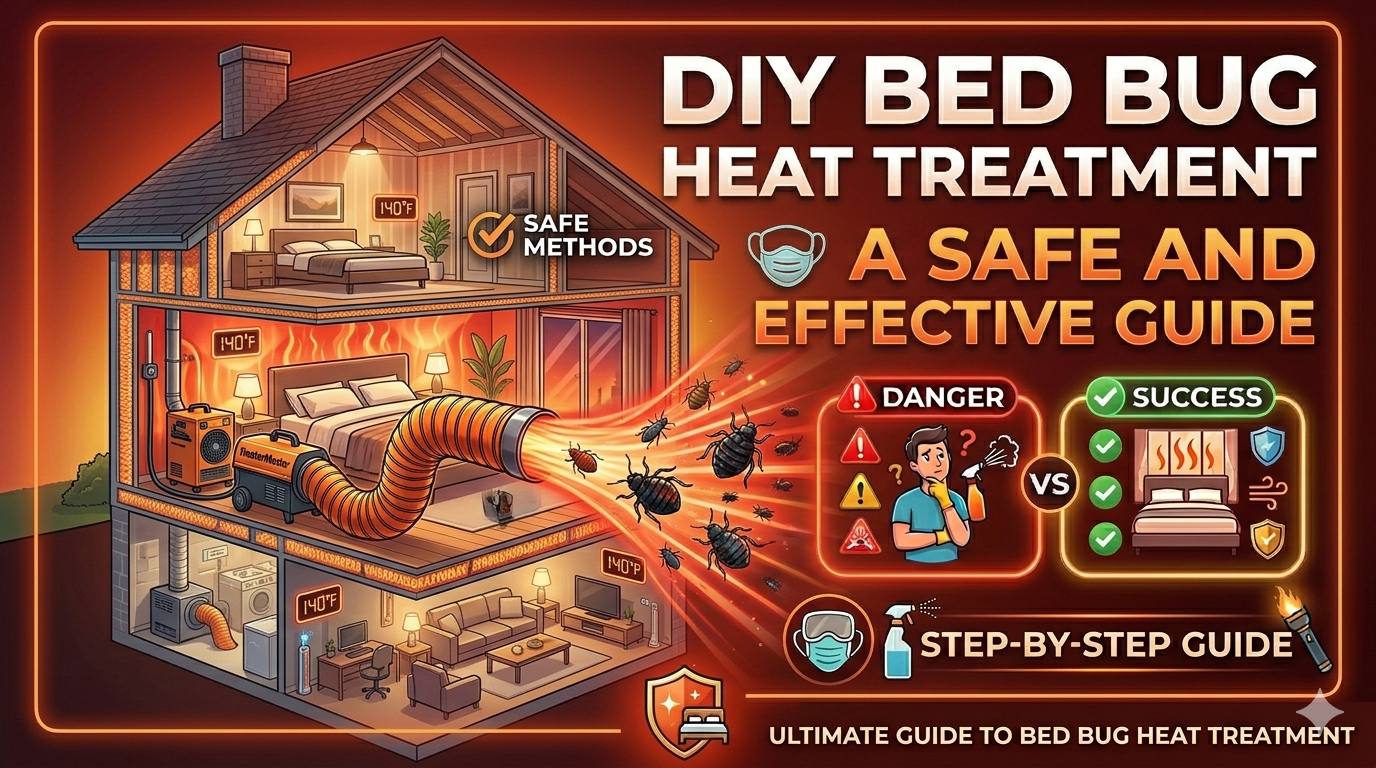
DIY Bed Bug Heat Treatment Methods and Equipment
Can you really do heat treatment for bed bugs yourself? Yes, but only with the right equipment. The biggest mistake people make is using a regular space heater. They max out around 85–90°F under real conditions. That’s warm, not lethal.
Portable Heaters: Types and Considerations
You need either propane torpedo heaters (powerful but require ventilation and careful fire management) or electric bed bug-specific heaters (purpose-built to reach 120–140°F, plug into 240V outlets like your dryer). These are what rental services provide.
Standard 120V consumer space heaters and your home’s central heating won’t cut it. Don’t waste time on them.
For a single bedroom (~400 sq ft), one dedicated heater unit is typically sufficient.
Fans and Air Movers for Circulation
Non-negotiable. High-velocity air movers, not desk fans, push heat into furniture, under beds, and into crevices. Without them, hot air pools near the ceiling while the floor stays cool and bugs survive. A standard 400 sq ft rental package usually includes two air movers.
Temperature Monitoring Tools
Place thermometers in your coldest spots, inside mattress folds, furniture joints, near exterior walls. If those never hit 122°F, your treatment failed regardless of what the room air read.
Data loggers give you a time-stamped record of temperatures across the room. Most rental packages include an infrared thermometer at minimum.
Safety Equipment and Precautions
- Keep a fire extinguisher in the room
- Temporarily remove smoke detectors (replace immediately after)
- Wear heat-resistant gloves when handling equipment
- Never leave treatment completely unattended
- Fully vacate the space: people, pets, and plants
Step-by-Step DIY Bed Bug Heat Treatment Process
How long does DIY bed bug heat treatment take? Budget a full day, typically 6 to 10 hours from setup to cool-down, depending on room size and starting temperature. Here’s exactly how to do it.
Step 1 — Preparation: Decluttering and Pre-Treatment
Do this 24–48 hours before treatment day.
Remove from the treatment area:
- Aerosol cans, lighters, candles — fire hazard
- Medications, vitamins, makeup, nail polish — heat-sensitive
- Vinyl records, CDs, DVDs — will warp
- Artwork, photos, oil paintings — irreplaceable and heat-sensitive
- Chocolates and wax items — will melt
- Plants and pets — obviously
- Wine and alcohol bottles — pressure builds in heat
- Musical instruments — wood can crack and glue can fail
Prepare items staying in the room:
- Open dresser drawers and closet doors so heat can penetrate
- Spread out piles of clothing, don’t leave them folded
- Lean mattresses against the wall at an angle to allow heat circulation on all sides
- Pull furniture away from walls by at least 6 inches
- Open books and document folders so heat reaches the pages
Don’t use bug spray or foggers before treatment. This is critical. Repellent chemicals scatter bugs into wall voids and deep harborages right before treatment, making it far harder for heat to reach them.
Step 2 — Setting Up the Heating Equipment
- Place heater units centrally in the room, away from walls and curtains
- Set up air movers/fans to create a circular airflow pattern that hits every corner
- Place temperature data loggers or probe thermometers in your coldest spots: under the mattress, inside furniture joints, near exterior walls, under clutter piles
- Seal gaps under doors with towels or door draft stoppers to retain heat
- Cover drafty old windows with plastic sheeting if needed
Step 3 — Heating the Space
Turn on heaters and let the room climb. Monitor the rise:
- Room air should reach 120°F within 1–2 hours for a properly equipped setup
- Your target air temperature is 135°F, this gives you the buffer needed for cold spots to reach lethal levels
- Once 135°F is reached, maintain it for at least 4–5 hours
- Check your cold-spot thermometers every 30–60 minutes. If a cold spot is not reaching 122°F, reposition a fan to direct heat there
Do not crank the heater to maximum and walk away. Managed, steady heat with active airflow is better than blasting and hoping.
Step 4 — Monitoring and Verification
This is where most DIY attempts fail. People hit 130°F on the thermostat and call it done. That’s not enough.
Before ending treatment, confirm:
- Every cold spot measured hit and sustained 122°F or above
- The room maintained target temperature for the full duration
- Data logger readings show no temperature dips below lethal threshold
If a cold spot never reached 122°F, extend treatment time and reposition airflow toward that area. Don’t end treatment until your thermometers confirm success everywhere.
Step 5 — Post-Treatment Procedures
- Turn off heaters and let the room cool naturally
- Once cool enough to enter safely, vacuum thoroughly, baseboards, mattress seams, furniture joints, carpet edges
- Seal the vacuum bag immediately and dispose of it outside
- Encase your mattress and box spring in bedbug-proof covers within 24 hours of treatment
- Install interceptor traps under bed legs to catch any stragglers and monitor for re-infestation
- Inspect weekly for the next 4–6 weeks
Potential Risks and Damage Associated with DIY Heat Treatment
Will DIY bed bug heat treatment damage my furniture or electronics? Potentially, yes and this is where you need to be honest about what’s in your room.
Damage to Electronics and Sensitive Items
Most modern electronics have operating temperature limits around 95–104°F. Sustained exposure to 135°F+ will damage or destroy them. This includes:
- Televisions and monitors
- Gaming consoles and computers
- Printers
- Smart home devices
Remove all electronics before treatment. Full stop. No exceptions.
Risk of Fire Hazards
Leaving high-wattage heaters running in a sealed room for hours is a legitimate fire risk if anything flammable is nearby. Curtains, loose papers, cardboard boxes, and extension cords rated below the heater’s wattage are all hazards. Use only properly rated cords, keep flammables away from heaters, and never leave the space completely unsupervised for long periods.
Structural Damage Concerns
At proper treatment temperatures (135°F air), most homes handle heat fine. Problems arise when temperatures go too high for too long. Risks include:
- Paint bubbling or peeling near heat sources
- Caulk and window sealant softening
- PVC pipes softening in rare cases of extreme temperatures
- Glue joints in older furniture loosening
Stay within the 130–145°F air temperature range. You’re not trying to bake the room, you’re trying to precisely maintain lethal temperatures, not exceed them by 30 degrees.
Incomplete Treatment and Re-infestation
This is the most common and costly DIY failure. You treat one room. Three weeks later, bugs reappear because:
- They fled into the wall void or adjacent room before temperatures got lethal
- A cold spot in your mattress or furniture survived treatment
- You treated the bedroom but not the couch where you’ve been sitting all week while avoiding your bedroom
Incomplete treatment doesn’t just fail, it can make things harder going forward by scattering the population deeper into the structure.
Effectiveness and Survival Rates of DIY Bed Bug Heat Treatment
Factors Influencing Success
Professional heat treatments succeed at a very high rate because pros control every variable — equipment sizing, airflow, monitoring, and timing. DIY success rates are lower simply because the margin for error is higher.
The key factors that determine whether your DIY treatment works:
- Using professional-grade or rental-grade heaters (not consumer space heaters)
- Maintaining the right temperature at cold spots, not just in the open air
- Adequate air circulation throughout treatment
- Long enough hold time (4–5 hours minimum after reaching target temp)
- Proper preparation: no clutter, no bug-scattering sprays beforehand
Common Mistakes Leading to Failure
- Trusting the heater’s thermostat instead of measuring cold spots independently
- Running treatment for 2 hours instead of the necessary 4–5+
- Not sealing door gaps, so heat bleeds out continuously
- Leaving furniture pushed against walls where heat can’t penetrate
- Treating only one room when bugs have already spread
Comparing DIY Effectiveness to Professional Treatments
A professional heat treatment done correctly is as close to 100% kill rate as you can get in a single session. DIY, done carefully with proper equipment and monitoring, can achieve similar results for small, contained, single-room infestations.
For larger or multi-room infestations, the complexity rises dramatically. The honest truth from pest control professionals is that DIY heat treatment is a legitimate option for early-stage, single-room problems, and a risky gamble for anything more serious.
Cost Analysis: DIY Bed Bug Heat Treatment vs. Professional Services
How much does DIY bed bug heat treatment cost compared to professional services? Here’s the honest breakdown.
Cost of Renting DIY Equipment
Rental packages for professional-grade bed bug heaters (sufficient for one room, ~400 sq ft) typically run:
- Budget packages: $99–$150 per 24 hours
- Mid-size packages (up to 800 sq ft): $200–$300 per 24 hours
- Larger setups: $300–$500 for multi-room capacity
Delivery fees, if applicable, start around $50–$200. Most rentals come with fans, extension cords, an infrared thermometer, and instructions.
Cost of Buying Equipment
If you own property or vacation rentals and anticipate needing treatment again, buying equipment can make financial sense. Professional-grade electric heater packages suitable for DIY use start around $500–$1,500 depending on capacity. You recover that cost after one or two treatments compared to professional pricing.
Time Investment
Budget a full day minimum per room:
- Preparation: 3–5 hours the day before
- Setup: 1–2 hours
- Active treatment: 6–8 hours
- Cool-down and post-treatment cleanup: 1–2 hours
For one bedroom, you’re looking at a full weekend commitment if you include prep.
Average Cost of Professional Heat Treatment
- Single room: $300–$1,000
- Whole house (average home): $2,000–$4,000
- Large homes or severe infestations: Up to $5,500+
Professional treatments typically include a guarantee and follow-up inspection, which DIY does not.
When DIY Is Truly More Cost-Effective
DIY wins when:
- The infestation is caught early and contained to one room
- You have time to prepare and execute properly
- You’re willing to rent professional-grade equipment (not improvise with consumer heaters)
- You’re treating a single item or small space (a car, a single piece of furniture) where a portable unit is genuinely sufficient
DIY loses when:
- The infestation has spread beyond one room
- You don’t have a full day to dedicate to it
- You’re in an apartment with shared walls
- You’ve already tried DIY once and bugs came back
Understanding DIY Bed Bug Heat Treatment: Is It Right for You?
Heat treatment means raising a room’s temperature high enough to kill every bed bug and every egg inside it, no chemicals, no residue. Heat gets into places sprays simply can’t: mattress seams, furniture joints, behind baseboards.
The science is the same whether a pro does it or you do. The difference is equipment, precision, and experience.
Why Consider DIY Heat Treatment?
Mostly cost. Professional whole-house heat treatment runs $2,000–$4,000. Renting professional-grade equipment yourself starts around $99–$299 per day. That gap is hard to ignore when you’re losing sleep over this.
When DIY Heat Treatment Is NOT Recommended
Skip DIY and call a professional if any of these apply:
- Bugs have spread to multiple rooms
- You live in an apartment with shared walls, heat drives bugs into neighboring units
- You’ve already been spraying repellent chemicals, which scatter bugs deeper into walls before treatment
- Your home is old with poor insulation and can’t retain heat
- Elderly people, young children, or pets can’t be fully removed during treatment
The Science Behind Heat Treatment for Bed Bugs
Lethal Temperatures for Bed Bugs and Their Eggs
Here’s where most articles get vague. Let me give you the actual numbers.
According to research published in the journal PLOS ONE and studies from Virginia Tech’s Department of Entomology:
- Adults and nymphs die at 118°F (48°C) when exposed long enough
- Eggs require 122°F (50°C) to be reliably killed
- At 45°C (113°F), adults have a lethal exposure time of about 94 minutes, but eggs can survive up to 7 hours at that temperature
- At 48°C (118°F), eggs need about 71.5 minutes of sustained exposure to die
This is why pest control professionals don’t just aim for 118°F; they target 135°F to 145°F (57–63°C) air temperature. The extra buffer ensures heat penetrates cold spots in furniture, walls, and mattress cores where temperatures lag behind the room air.
A 2024 study from Paris involving 5,400 bed bugs found that specimens covered by blankets required temperatures of 60°C (140°F) maintained for 120 minutes to achieve full mortality, compared to just 60 minutes for bugs in direct, uncovered exposure. That extra layer of insulation around a hiding bug is what kills most DIY treatments.
How Heat Penetrates Household Items
Heat moves by convection (air circulation) and conduction (surface-to-surface transfer). The air heats up fast. Solid objects take much longer.
A mattress center, a wooden bed frame joint, or a pile of clutter can remain at a survivable temperature even when the room air reads 135°F. This is called a heat refugium, a pocket where bugs survive the treatment and later repopulate.
Fans are not optional. They’re what force hot air into cracks and around objects, reducing cold spots. Without airflow, you get uneven heating and survivable refugia.
Factors Affecting Heat Treatment Effectiveness
- Humidity: High humidity slows heat transfer and can reduce effectiveness
- Clutter: Every pile of stuff is a potential cold spot and hiding place
- Room insulation: Poor insulation means heat escapes faster than you can maintain lethal temperatures
- Ceiling height: Tall ceilings require more heating capacity
- Infestation density: Heavily infested rooms with bugs deep in furniture need longer exposure times
The Bottom Line: Heat Works, But Only If You Take It Seriously
DIY bed bug heat treatment is not a shortcut. It’s a legitimate method that requires the right equipment, careful preparation, and disciplined execution. Skip any of those and you’re spending a full weekend, potentially damaging your belongings, and still waking up with bites two weeks later.
If bugs are in multiple rooms, you’ve already tried DIY once, or you’re not sure how bad the infestation is, spend the money on a professional. The cost of getting it wrong a second time, in stress, lost sleep, and potential re-treatment costs, almost always exceeds what you’d have paid a professional the first time.